Zooming with Annotations
By aquaveo on January 13, 2021Do you have a location in your GMS groundwater project that requires you to zoom in and out of a particular location frequently? It sometimes can become tedious to constantly have to locate the same area in the project and manually zoom in on that area using the Zoom tool. The annotation tools provide a way to make this process easier.
Zooming using the annotation tools requires the use of the Zoom to Layer command. This is done by doing the following:
- Create a new world space annotation layer. It is important that the annotation layer be set to use the world space which makes use of the project projection. Using annotation layers set to screen space will not work.
- Create annotations that mark out the zoomed in area. Using the Create Rectangular Object tool often works best for this task. Make certain that all objects added to this annotation layer are within the zoom in area.
- In the Project Explorer, right-click on the annotation layer and select Zoom to Layer. This will frame the project to the extent of the annotation objects.
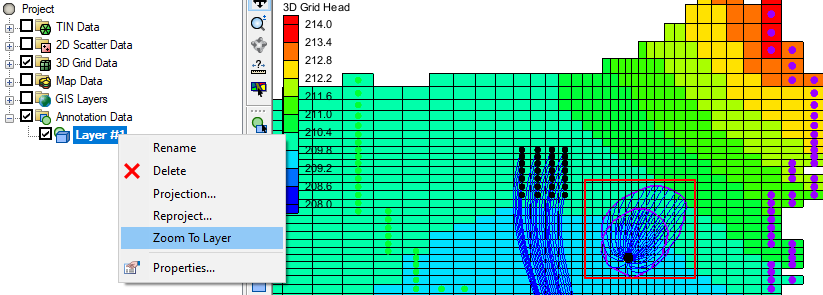
Following this method, you can zoom or pan to other locations in the project and quickly return to the area marked by the annotation layer by using the Zoom to Layer command. If there are multiple areas of interest in the project, create a separate annotation layer for each area you want to zoom in on. Doing that can make navigating around the locations of your project easier.
While we discussed doing this in GMS, it can also be done in SMS for surface-water projects. The annotation tools are similar in SMS and the Zoom to Layer is available for annotation layers in the Project Explorer.
Try out using annotations to navigation your groundwater project in GMS today!