Aquaveo & Water Resources Engineering News

Tips for Finding Information on the XMS Wiki

The Aquaveo XMS Wiki contains over 8000 pages of information and images about SMS, GMS, WMS, and other Aquaveo products (collectively called "XMS"). While we try to make the information as easy to find as possible, sometimes the sheer volume of available information can make a particular search term harder to locate. Here, we discuss a few ways to find the information you need using the XMS Wiki.

Help Button

Most dialogs in SMS, GMS, and WMS contain a Help button at the bottom of the dialog window. Clicking this button will generally take you directly to a page on the XMS Wiki about that dialog. This is the quickest way to find information about a dialog.

Navigation Links

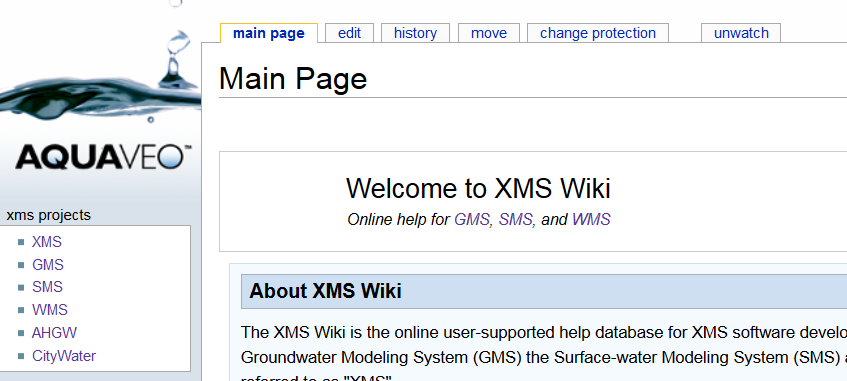
When you visit any page on the XMS Wiki, an "XMS Projects" menu is found at the top left of the page. Click on any of the products listed there to be taken to the main page for that product. Once there, click on any of the links in the Wiki Sections section on the lower right to be taken to a table of contents listing all of the pages discussing the features of that product.

Example of the XMS Wiki

At the bottom of the main page for the product, there is also a navigation template listing main topics for that product. This allows you to quickly navigate to any of those main topics.

Search Field
Example of the XMS Wiki Projects menu

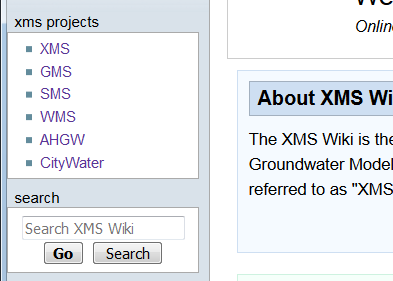
Directly below the "XMS Projects" menu is a search field. If you start typing in that field, the XMS Wiki will attempt to locate a page containing what you type. To find a page about a particular product, preface the search term with that product's abbreviation, followed by a colon and the search term. For example, if you are searching for information about the bridge scour features in SMS, type "SMS:Bridge Scour" and a list of articles will appear below the search box. Simply select the desired article to be taken directly to it.

You can also enter only the search term and select the "containing…searchterm", where "searchterm" is the term you entered in the search box. This will bring up a list of pages containing the term you entered. This can be useful when you don't know what the page might be named, but you know a term that might be used on that page.

Categories

At the bottom of every page on the XMS Wiki is a list of one or more categories. This provides another way to locate information on a given topic. Simply click on the category to find a list of pages, images, and additional categories related to that topic.

Google

One option that is often overlooked is to use the power of the Google search engine. To search for pages or information on the XMS Wiki, enter "searchterm site:xmswiki.com", replacing "searchterm" with the word or words you are seeking. This tells Google to provide results only from the XMS Wiki. Click this link for an example.

Page Prefixes

Most pages on the XMS Wiki are prefaced by a product abbreviation. When reviewing search results, make sure the page you are on has the appropriate abbreviation at the beginning of the page title (e.g., "SMS:Display Options", "GMS:Display Options", "WMS:Display Options"), as similar pages may be found for various products.

Page Notices

Sometimes when searching for information or a feature, you may find pages that document obsolete or future features. These pages will have notices at the top indicating this status. There are other types of notices that may appear at the tops of pages, as well, so always be sure to read any notices that appear.

Try out these search methods today by visiting the XMS Wiki today!

Blog tags: 

Snapping Mesh Nodes to Arcs

After generating a mesh, you might notice that not all of the nodes line up along key features. There are a few ways to resolve this, but SMS 13.0 introduces a new method: the Snap Mesh to Arcs command.

In order to use the Snap Mesh to Arcs command, you must have the following:

  • 2D Mesh
  • Map coverage

Once you have the needed components, snap the nodes to an arc by doing the following:

  1. On the map coverage, draw an arc or arcs where you want to move the mesh nodes.
  2. Select the desired arcs.
  3. Make certain the correct map coverage and mesh are active in the Project Explorer.
  4. Right-click on the map coverage in the Project Explorer and select Snap Mesh to Arcs.
  5. Specify a tolerance value in the Snap Mesh to Arcs dialog.
Example of snapping mesh nodes to arcs

The command aligns the nodes in the mesh to the selected arcs in the map coverage. If no arcs are selected, this command will move nodes for all arcs in the coverage, so be certain to either select the correct arcs or make certain there are no extra arcs on the coverage.

When using the tool, it will only work with the active mesh and the active map coverage. Be certain that the correct mesh and map coverage are active in the Project Explorer.

It should be noted that not all nodes will be snapped to the selected arc. Any node that could cause instability, if moved, in the mesh will not be moved. Furthermore, nodes outside of the tolerance value will not be moved. When the nodes have been moved they cannot be moved back, therefore it might be a good idea to first use the tool on a duplicate of the target mesh then, if the results are good, rerun the tool on the target mesh.

The Snap Mesh to Arcs tool can be a useful addition to your mesh editing tools. Try it out in SMS today!

Blog tags: 

Using Display Options with Multiple UGrids

Have you experienced setting display options for an unstructured grid only to see those settings not take? In GMS, each unstructured grid (UGrid) uses its own set of display options. A common reason for display settings not appearing is selecting the wrong UGrid when you have multiple UGrids.

Changing the UGrid display settings will only affect one UGrid at a time. So it is important to make certain the correct UGrid display options are being changed.

There are three ways to reach the Display Options dialog for UGrids:

  • Display Options macro
  • Display Options command in the Display menu
  • Display Options command in the UGrid Data right-click menu in the Project Explorer
Display Options list showing multiple UGrids

Once in the Display Options dialog, check to see which UGrid is active. This is done by looking a the list on the left side of the dialog. The list on the left will indicate which By default, the display option will be set for the active UGrid. So one method to make certain you are setting display options for the correct UGrid, it to make certain that UGrid is the active UGrid in the Project Explorer before entering the Display Options dialog.

Multiple UGrids in the Project Explorer

The Display Options dialog can be used to change display settings for a UGrid that is not active. This is done by selecting the desired UGrid from the list on the left in the dialog. It should be noted that selecting a UGrid in th Display Options dialog does not cause the UGrid to become the active UGrid in GMS. So when you exit the Display Options dialog, you may need to change which UGrid is active in the Project Explorer to see the display setting changes.

It should be noted that which UGrid is active also matters when accessing the Dataset Contours Options dialog.

Hopefully, this helps clarify how to set display options in projects that have multiple UGrids. Make use of Ugrids disaply options in you project using GMS today!

Blog tags: 

Changing the Hydrograph Display in WMS

One of the more useful functions of WMS is displaying hydrographs. But did you know that WMS provide a multitude of ways to display each hydrograph?

Using the hydrograph display options allows you to alter the display of each hydrograph to better show the hydrograph data. To customize the WMS hydrograph display, right-click on the open hydrograph and select Display Options. This brings up a dialog with options to change the display for that hydrograph.

Below is a summary of the items that can be customized on each of the Display Options tabs.

Hydrograph display example
  • The General tab allows changing items such as the hydrograph title and subtitle as well as the border style and viewing style. It also allows for changing the font size. The grid lines are also controlled here to let you decide the line precision and if the x and y lines will be shown.
  • The Plot tab contains a number of present plot options to adjust how the hydrograph data is shown. Some of the options include changing to a bar graph, only displaying points, using 3d display, or selecting different line graphs.
  • The Axis tab define how x and y axis are displayed. Specifically, the values range shown on these axis can be truncated or adjusted.
  • The Font tab controls the font used for the title, subtitle, points, axis, etc.
  • The Color tab allows changing the color of the plot labels and area. A number of preset color options are also included.
  • The Style tab changes the size, style, and color of the point and lines used in the hydrograph.

Once you have set the hydrograph displays to best show off the data, you can export your hydrograph. Hydrographs can be exported either by right-clicking on them and choosing Export/Print, or by choosing the Export button from within the Display Options dialog. Export formats include JPG, PNG, and text files. Hydrographs can be printed, copied to the clipboard, or saved to a file location.

Now that you have more tools for working with hydrographs, try them out in WMS today!

Blog tags: