Using the Temporal Tools in the Dataset Toolbox
By aquaveo on September 9, 2020SMS contains several ways to work with datasets. Perhaps the most useful of these is the Dataset Toolbox. The Dataset Toolbox has several tools for generating new datasets. Among these are the temporal tools which allow adjusting the time steps for a transient dataset. The temporal tools include two options: Sample Time Steps and Merge Dataset.
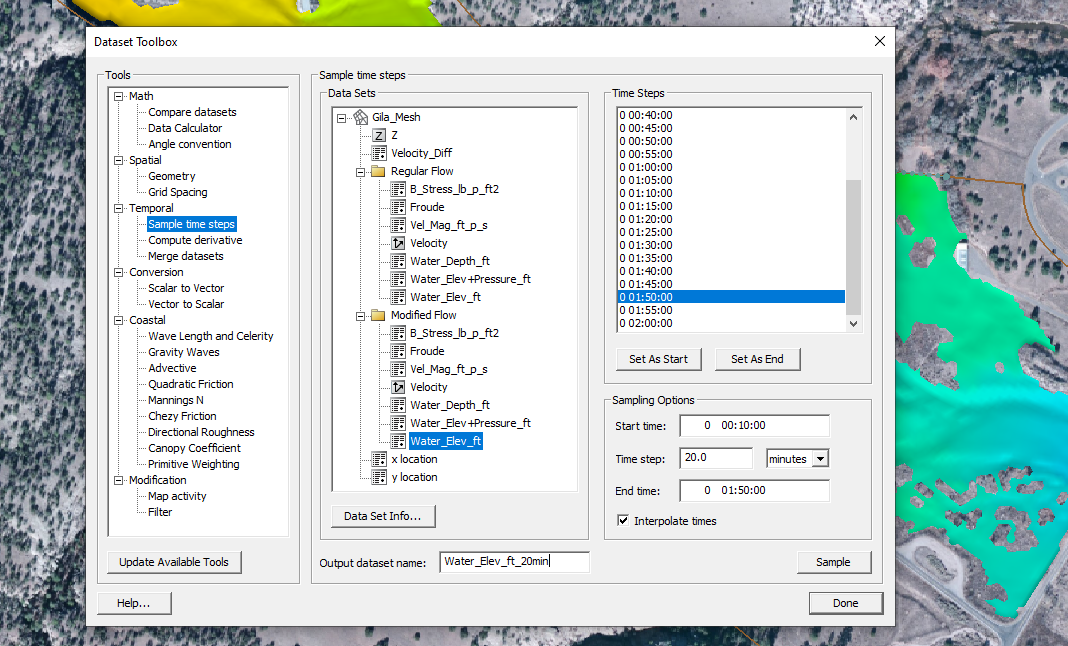
The Sample Time Steps tool allows the creation of a dataset with a different number of time steps. The time steps can either be increased or decreased. To use the Sample Time Steps tool:
- Open the Dataset Toolbox and select the Sample Time Steps tool.
- Select the transient dataset you want to use.
- Select the starting and end times.
- Enter the time step frequency and units.
- Give the new dataset a name and click Sample.
The other temporal tool is the Merge Dataset tool. This allows us to combine two transient datasets. To use this tool, the transient datasets being combined cannot have overlapping time steps. Most often, this tool is used to append multiple simulation runs together.
For example, if you completed an SRH-2D model run for one day, then created a new simulation for a second day (using a hot start file from the end of the first day simulation run), you could combine the results of the two simulation runs using the Merge Dataset tool.
To use the Merge Dataset tool:
- Open the Dataset Toolbox and select the Merge Datasets tool.
- Select the first dataset to use, then select the second dataset.
- Enter a name for the combined dataset and click Compute.
When using the Merge Dataset tool, make certain that the first dataset selected has time steps that are earlier than the second dataset selected.
The temporal tools in the Dataset Toolbox provide a simple way to adjust transient datasets in your project. Try using these tools in SMS today!