Sharing Display Themes in GMS
By aquaveo on January 15, 2020Display themes make showing off your groundwater model easier. A display theme is a set display parameters that can be saved in a project to be used repeatedly. But, after creating a display theme that works well, have you ever wanted to use that same display theme for a different project?
In GMS, display themes are saved with the project file. Therefore, importing a display theme into another project isn’t quite as simple as importing a raster file or image. However, the process isn’t all that complicated either.
To import a display theme from an existing project into a new project, do the following:
- Open the project with the display theme you want to import to other projects.
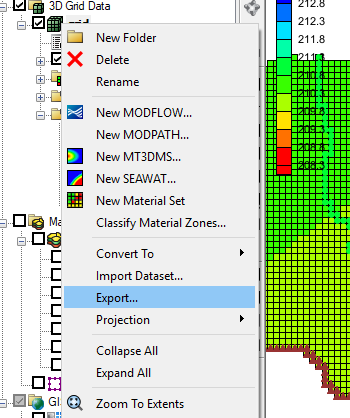
- Remove everything from the project except for the desired display theme.
- Use the Save As command to save the project with a different name. The project should only contain the display theme.
- Open the project that is to receive the display theme.
- Select the File | Open command.
- In the Open dialog, select the project containing the display theme and turn on the Import into current project option before clicking the Open button.
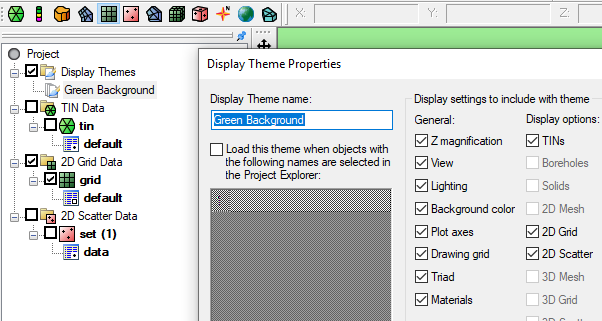
Using these steps will add the display theme to the existing project. The new display theme will appear in the Project Explorer.
Note that this project requires using the File | Open method of importing a file. The Open macro can also be used. Other methods for importing files into GMS, such as drag-and-drop, will not work.
Also, be aware that when importing a display theme into an existing project, the display theme will only work with data like that in the original project. For example, a display theme built for a project using 3D UGrids will not work with a project that uses 2D grids.
Display themes are a great tool for visualizing your data in GMS. Try saving and sharing them in GMS today!