XMS

Switching Model Executables

The Groundwater Modeling System, Surface-water Modeling System, and Watershed Modeling System (collectively known as XMS) applications make use of multiple numerical models. XMS is packaged with the executables for each of these numerical models. At times, you may need to switch out which numerical model executable XMS uses.

In general, you will want to use the model executable that comes packaged with the XMS. XMS is coded to work with the specific model executables that are distributed with each version of the software.

There are some reasons you might want to change which model executable it used. It might fix a bug with the model executable. It might get you access to features in an older or newer version of the model executable. It might also help you test issues with the numerical model. Replacing the model executable isn't guaranteed to help with any of these, but it is one option for troubleshooting with all of them.

For all XMS applications, the numerical model executables to be used are selected in the Preferences dialog. If you already know where the model executable is, you can copy and paste the executable into the preferences dialog. To do so, use the following workflow:

  1. Copy the executable file path. If using Windows 11, right-click on the desired model executable and select "Copy as Path."
  2. If using Windows 10, open the Properties dialog from the right-click menu. Copy and paste the location path into a text document. Then, make sure to grab the file name ending in ".exe" as well. The executable path will be incomplete without that file name.
  3. In your XMS software, open the Preferences dialog from the Edit menu.
  4. Find the model executable that you want to change and click on the file path next to the name or the Browse button.
  5. In SMS or WMS, this will bring up an Open dialog. In the File name box, paste in the new executable path. If you are using Windows 11, make sure to delete the quotation marks at the beginning and end. Selecting Open saves the new model executable.
  6. In GMS, the model executable is editable without bringing up the Open dialog. Simply erase the former executable path and paste in the new one. As long as the path is a valid path and the path ends in ".exe", GMS will save it. Again, for Windows 11, delete the quotation marks.
  7. Finalize the model executable by clicking OK to exit the Preferences dialog. Otherwise, the executable will not save.
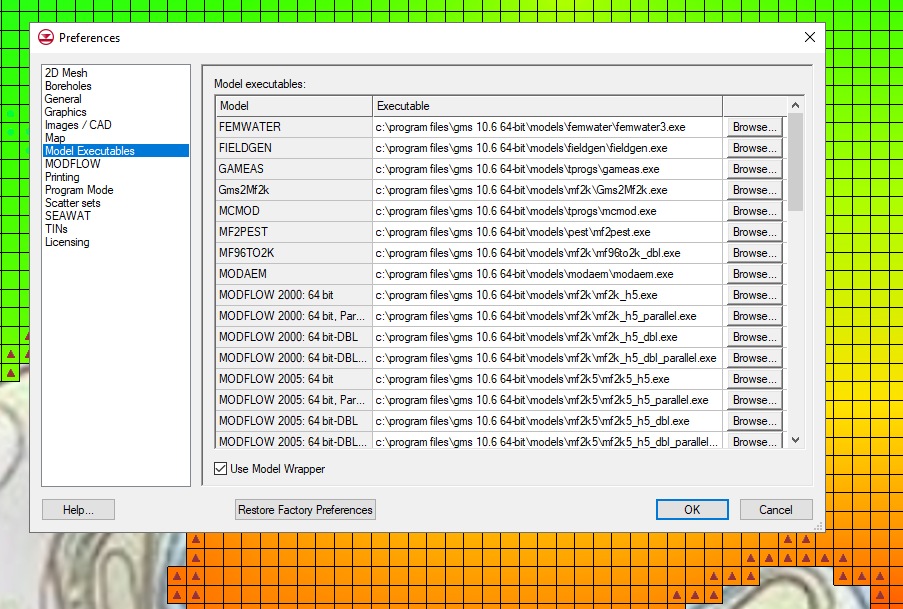
Example of model executables in the Preferences dialog

Now, there are some issues to keep in mind. As mentioned earlier, changing out a numerical model executable is not guaranteed to fix a particular issue or even improve the situation. Older or newer versions of the model executable may not always be compatible with your version of XMS. Sometimes the model executable is not compatible with a particular project. The new executable might even worsen the situation. If any of these things happen, you can reintroduce the original executable.

Check out the available model executables in XMS today!
Blog tags: 

Hardware Guidance for XMS

Are you wondering about what computer system to use with GMS, SMS, or WMS (collectively known as XMS) to get the best performance? The hardware you select will certainly make a difference in how XMS performs. This blog post intends to give some guidance for selecting hardware for use with XMS.

What hardware is required will depend very much on which models you choose to run and how large the projects are. Many lower power systems will technically run the software, but the interface may be slow and the simulation may take a very long time to run. In the end, the computer components you choose will depend on what you intend to do and the budget you have to work with. To help in the decision-making process, we have included some recommendations and explanations on how different components will affect the performance of the software. Look at your budget and see what is reasonable; it is recommended that you get the best you can afford.

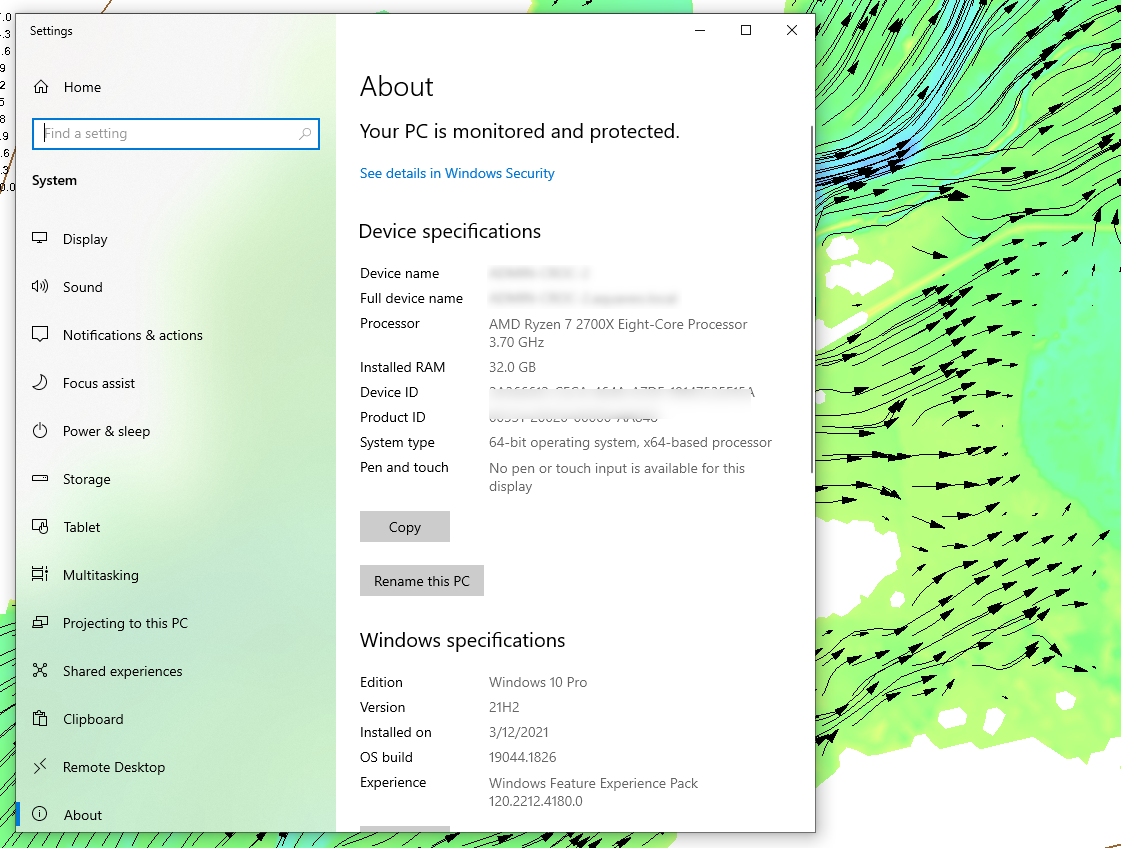
Example of System Hardware for XMS

For some basic system requirements, you can check out this page on our wiki. Note that these requirements will change over time as technology evolves. The system requirements will change as future advancements are implemented into XMS.

The CPU is the component that will make the most difference in how fast the software runs. When comparing CPUs, we recommend looking at single-core rather than multi-core performance. The reason for this is that many of the models in our software do not take full advantage of multiple CPU cores at the same time. That being said, we do recommend that the CPU have at least 4 cores to give everything the power that it needs. Remember that it should be the best that you can afford

For RAM, 16 GB is usually sufficient, but some very large projects have required more. You may also want to get more RAM if you plan to have more than one project open at the same time. Our office computers have 16-32 GB of RAM, depending on the machine.

For a graphics card, we recommend getting a current low to mid-range dedicated card designed for gaming. Large projects can require multiple gigabytes of VRAM, but our cards with 4GB have yet to run into issues needing more. The speed of the GPU will particularly affect how smoothly the pan, zoom, and rotate tools work.

For storage, we usually recommend having an SSD with plenty of space. Projects can end up taking quite a bit of disk space, especially if the Save As function is used frequently. Having faster storage will reduce project load times and how long it takes to save a project. Note that storing projects on external/network drives have been known to cause issues, so we recommend storing any project files you plan to open on a local drive. Again, it is recommended that you get the best you can afford.

Having the right hardware will increase the usefulness of XMS for your modeling projects. Check out the XMS software applications today!

Blog tags: 

Performing a Silent Install for ALS

Are you an IT administrator needing to perform a silent install of GMS, SMS, or WMS in a classroom or office? We have gone over the process to do this in the past. However, our licensing methods have changed since those instructions were first written. Because of this, we have felt it would be useful to update our users on the new method of configuration so they will be able to properly set up their silent installs. This post will review registration for the new licensing method and how to perform silent installs with it.

This silent install (or quiet install) workaround requires each user to have the rights to modify the registry. If registry access is restricted, a network administrator can do this by opening the Group Policy Management Editor and creating a startup script that automatically runs the batch file whenever the computer is restarted.

Note: Editing the Registry in Windows is a very advanced administration step. Please always create a backup of the Registry before making changes.

It can be a burden to manually update the local code in HKEY_CURRENT_USER for each user on each computer. The silent install process is simplified by creating a Windows Registry file that contains the license information and a batch file that can be executed to insert the registry information and launch WMS. The batch file automatically updates the registry for the user and then opens the WMS application. This is the safest way to edit the registry key, as well. The batch file can then be placed on each computer that needs to be updated, and the individual users can execute it as needed.

This workaround uses WMS as an example. This information also applies to GMS and SMS. You can see an example of a registry file in step 1 and the batch file in step 2, below.

  1. Create a file, "Netenble.001.reg", as follows:
    Windows Registry Editor Version 5.00M
    "ALS"="1"
    "ALSHost"="127.0.0.1"
    "ALSPort"="56789"

    ALS = 1 specifies the new registration wizard, with new "Local" codes beginning with L, F, or E, instead of 0 for the old network lock. ALSHost = 127.0.0.1 because the code is being located on the local machine. And ALSPort = 56789 should be the default - you can alternatively specify your own port if you would like. You could also specify an ALSCode (license code) as well if you don’t want registration to be required when first launching WMS.
    Note: This information was created using Windows 10. Because different Windows versions can have different REG file formats, we recommend you install WMS on one machine, register it to the correct local code, then export the registry key. Open the registry file in the text editor and remove every line except those similar to those shown in the image above, and save the file as "Netenble.001.reg".
  2. Create a file, "wms11.bat", that will update the registry and start WMS:
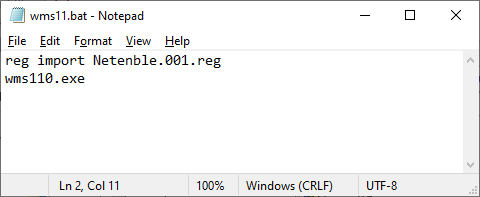
    reg import Netenble.001.reg
    wms.exe
  3. Place these two files in the WMS folder in the image that will be distributed to the affected computers. For example, for the 64-bit version of WMS 11.1, the default location for the folder is “C:\Program Files\WMS 11.1 64-bit\”.
  4. Create a desktop shortcut to the batch file for the convenience of the user. If doing this via a startup script in the Group Policy Management Editor, this step can be skipped.

This silent install workaround can save you significant time as a network administrator. If you experience issues while performing a silent install, feel free to contact Aquaveo for assistance.

Troubleshooting Model Executables

GMS, SMS, and WMS (collectively known as XMS) all make use of numerical models for the final simulation run. These numerical models include MODFLOW, ADCIRC, SRH-2D, GSSHA, HEC-RAS, etc. These numerical models are not developed by Aquaveo, but the XMS software does provide an interface for using these models. This article will discuss more about how the XMS software integrates with these numerical models.

XMS will allow you to import all of the starting data and define all the parameters for a numerical model simulation. After the project has been built in XMS, XMS will export all of the files needed for the model run. XMS will then access the numeric model executable and launch the numerical model to run your simulation.

If the numerical model fails to run, there sometimes can be an issue with the numerical model executable. Typically, you will receive a warning message stating the model executable can’t be found. When this happens there are two ways to resolve the conflict.

The first is to click the browse button on the warning dialog and browse to the location of the model executable. Select the model executable and simulation will start running. In most cases, the model executables are located in a folder called models located in the locations where the XMS software has been installed.

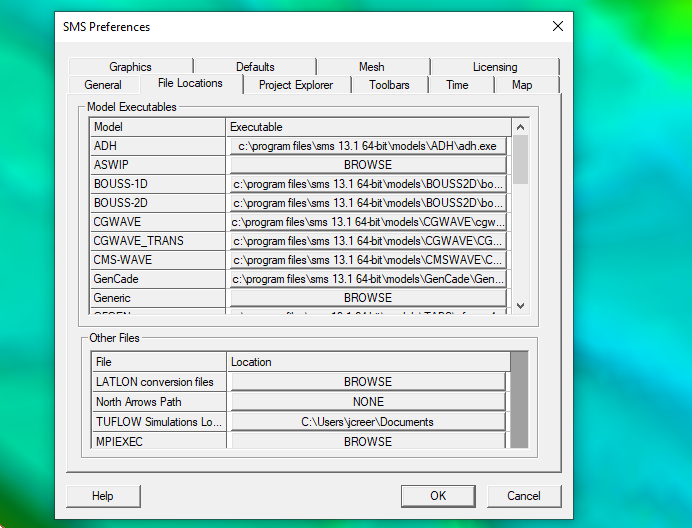
The second method is to make certain the path to the model executable location has been correctly in XMS. This is done by going the Preferences dialog (use the Edit | Preferences command). In the Preferences dialog, there is a tab call either Files or File Locations. On the Files tab is a list of the available numerical models and where XMS is accessing that executable for the model. From here, you can change the file path to point to the correct location of the model executable.

File Locations tab in the Preferences dialog

Often when the model executable cannot be found the cause is one of a few common issues. One is that the path location was not correctly set when XMS was installed. Another is that the numerical model was not installed correctly. And another is that you may have been using a custom installation of the numerical model software with the model executable in a location where XMS is not looking.

Also note that some numerical models require multiple executables. Often this is a pre-processor that has its own executable. Make certain that the file path is correct for all executables used by the numerical model.

Making certain the correct model executable can be found by XMS can make running your model simulation a lot easier. Check out all the available numerical models availing in XMS today!

Blog tags: 

Pages