We use cookies to make your experience better. To comply with the new e-Privacy directive, we need to ask for your consent to set the cookies. Learn more.

Using the Database Import Wizard in WMS
Do you have data stored in a database that you would like to import into your WMS project? Occasionally you might find yourself with a database that needs to be imported into your WMS project. This might be a geodatabase or some other sort of database containing GIS data that WMS does not recognize natively.
To import a database, WMS uses the Import Database Wizard. The wizard is accessed through the Import From Database command in the File menu. Once the wizard has been launched, there are a few steps you need to follow.
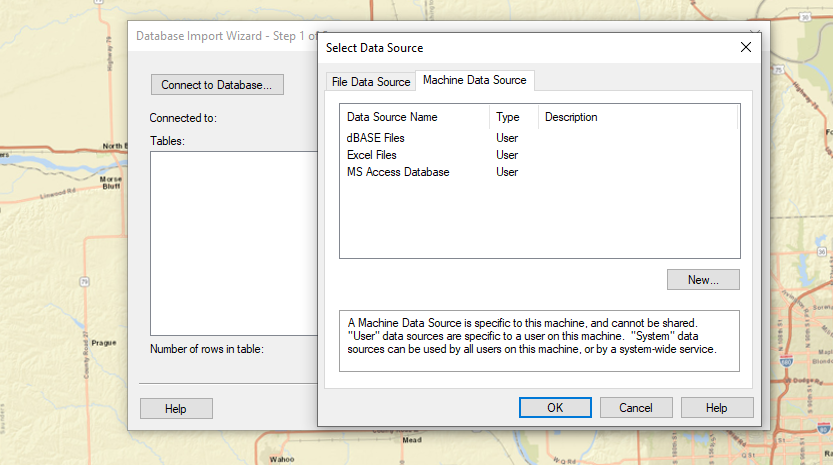
- Connect to a database. Use the Connect to Database button to connect to a database located on your computer or on a network. A preview of the database will be displayed in the tables in the wizard.
- Query information from a database table. You will have the option to create, copy, delete and import queries that retrieve data from the database. The query uses basic SQL statements which can be entered in the provided fields.
- View results of the query. The results of the database query are displayed for you to review. If the results are not what you expected, you will have the option to return to the previous step to fix the issues.
- Assign column type. You can select the kind of data that will be imported into WMS. The kind of data should be of the file types supported by WMS. There is also the option to set files as "no data".
After the data has been imported into your project, you can make use of the coordinate transformation tools in WMS to transform or translate the data if necessary.
If you have a database with data you would like to import into WMS, try using the Import Database Wizard in WMS today!
January 19, 2022
|
View: 329
|
Categories: WMS
|
By: <a class="mp-info" href="https://aquaveo.com/blog/author/admin">Aquaveo Staff</a>
About the Author

Performing a Silent Install of XMS (Passwords & Hardware Locks)
October 10, 2018
Tips for Finding Information on the XMS Wiki
September 25, 2019
Aquaveo 2024 in Review
December 30, 2024
How to Fix MODFLOW General Head Boundary Errors Using GMS
February 18, 2025
Help with Flow Direction and Accumulation
December 17, 2024
Connecting UGrid Points with Arcs
May 6, 2025
Simplifying Nested Grids with the Spectral Coverage
April 29, 2025
Converting Solids to Scatter Sets in GMS
April 22, 2025
Simplifying Watershed Modeling with Rho8 Tools
April 15, 2025
Enhanced Structure Options for CMS-Flow
April 8, 2025