We use cookies to make your experience better. To comply with the new e-Privacy directive, we need to ask for your consent to set the cookies. Learn more.
Converting External 3D Materials to 3D Grid Materials
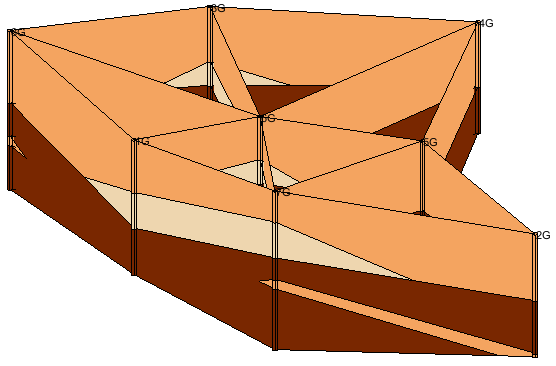
For your 3D grid project in GMS, do you have material data from a 3D mesh or other geometry that was created in an application other than GMS? It is possible to import this data into GMS and attach it to your 3D grid using a method which involves creating solids that GMS can use to assign materials. This is done by importing the data as boreholes and creating solids from them. This post will review how you can take the material data from a 3D mesh and transfer it to a 3D grid in GMS.
To do so, do the following steps:
- First, you will need to import the material data as Borehole data into GMS.
- You will then need to create horizons for these boreholes. Go to Boreholes | Auto-Assign Horizons.
- In the Auto-Assign Horizons dialog, choose Start from scratch, then click Run. The Horizon Optimizer dialog will appear. This step will take a while to complete.
- When complete, click "Read solution on exit" and click OK to close out of the dialog.
- Once the Horizons are defined, click Boreholes | Auto-Create Blank Cross Sections.
- Once blank cross sections exist, click Boreholes | Auto-Fill Blank Cross Sections.
- In the Auto-Fill Blank Cross Sections dialog, select what should be matched from the auto-fill options based on the needs of the project.

- Create a new coverage, just using the defaults should be fine in most cases.
- Using the Plan View and the Create Arc tool, create a closed arc surrounding all of the boreholes.
- Select Feature Objects | Build Polygons, to turn this closed arc into a polygon. You might also want to use the Redistribute Vertices command on the arc if needed.
- Turn this polygon into a TIN by using Feature Objects | Map → TIN to define the desired boundary of the solid.
- Finally, create solids from the boreholes by selecting Boreholes | Horizons → Solids. This will bring up the Horizons to Solids dialog where you can choose your desired settings.
- The solids can then be used to classify the materials zone in place of the mesh.
- If the solids are needed in another project, you can highlight one or more of the solids in the Project Explorer, right-click, and Export them as a *.sol file.
Try out using this workflow to add data to your projects in GMS 10.5 today!


