We use cookies to make your experience better. To comply with the new e-Privacy directive, we need to ask for your consent to set the cookies. Learn more.

Exporting Raster and Vector KMZ Files
Need to open your project data in Google Earth? GMS can do that by generating a KMZ file from your project data.
GMS allows creating either a raster KMZ file or a vector KMZ file.
Raster KMZ File
This option saves the project data as an image with georeferencing data. The data is clipped to match the current view in the Graphics Window.
To create the file:
- Switch to Plan View.
- Check that you are using geographic coordinates, otherwise it may be distorted.
- Use the File | Save As command.
- Set File of Type to be "Google Earth Raster KMZ File (*.kmz)".
- Select the Options button to set the resolution.
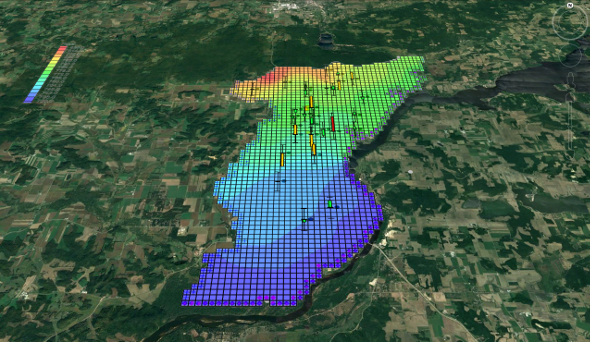
When pulled into Google Earth, a raster KMZ will simply display the file data as an image over the georeferenced location.
Vector KMZ File
This option saves the project data as vector information. All visible data in the Graphics Window will be included. Points, lines, and polygons will be saved in the file along with the georeferenced data.
- Switch to Plan View.
- Use the File | Save As command.
- Set File of Type to be "Google Earth Vector KMZ File (*.kmz)".
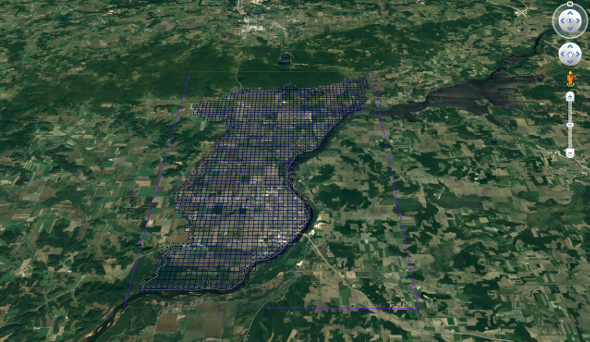
When imported into Google Earth, a vector KMZ will contain an image over the georeferenced location, along with a layers for any lines, points, or polygons contained in the file. These layers can be toggled on or off.
Transient Data
Transient data in GMS can be exported as a raster KMZ file animation.
- Switch to Plan View.
- Check that the project is using global coordinates.
- Select the Display | Animate command.
- In the Animation Wizard, turn on the KMZ file option.
- Set the options for where to save the file and what parameters to use.
After GMS generates the animation, you can open in Google Earth to see the results.
Now that you’ve seen how KMZ files can be generated, go ahead and give it try in GMS today.
April 25, 2018
|
View: 558
|
Categories: GMS
|
By: <a class="mp-info" href="https://aquaveo.com/blog/author/admin">Aquaveo Staff</a>
About the Author

Performing a Silent Install of XMS (Passwords & Hardware Locks)
October 10, 2018
Tips for Finding Information on the XMS Wiki
September 25, 2019
Aquaveo 2024 in Review
December 30, 2024
How to Fix MODFLOW General Head Boundary Errors Using GMS
February 18, 2025
Help with Flow Direction and Accumulation
December 17, 2024
Connecting UGrid Points with Arcs
May 6, 2025
Simplifying Nested Grids with the Spectral Coverage
April 29, 2025
Converting Solids to Scatter Sets in GMS
April 22, 2025
Simplifying Watershed Modeling with Rho8 Tools
April 15, 2025
Enhanced Structure Options for CMS-Flow
April 8, 2025