We use cookies to make your experience better. To comply with the new e-Privacy directive, we need to ask for your consent to set the cookies. Learn more.
Using Layer Range Options in GMS
The conceptual model approach in GMS is a very useful way to assign specific attributes to a MODFLOWmodel without having to manually input them cell by cell. One particularly helpful tool available in a GMS coverage is the "Layer Range" option.

Layer range can be used in addition to other coverage choices—such as streams, wells, rivers, head boundary, etc.—allowing you to be as precise as you need to be when applying your model attributes.
In the past, we have mentioned this tool in a blog post about assigning Ugrid attributes to specific layers, but that is only one of many helpful ways to use it. Here, we will go over each of the options available with the Layer Range, and exactly how they work.
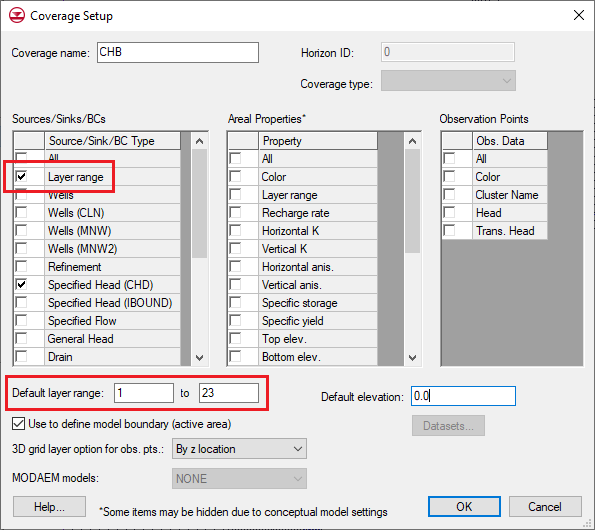
First, turn on this option by selecting "Layer Range" in the sources/sinks column of the coverage setup dialog. At the bottom of this dialog, make sure that the default layer range for the coverage covers all the parts of your grid that you wish to use.
Second, apply feature objects to your coverage. In our example, we have created a Time-Variant Specified Head arc.

Once your feature objects are in place, you can assign values to them in the attribute table. This is where the Layer Range settings will come into play.
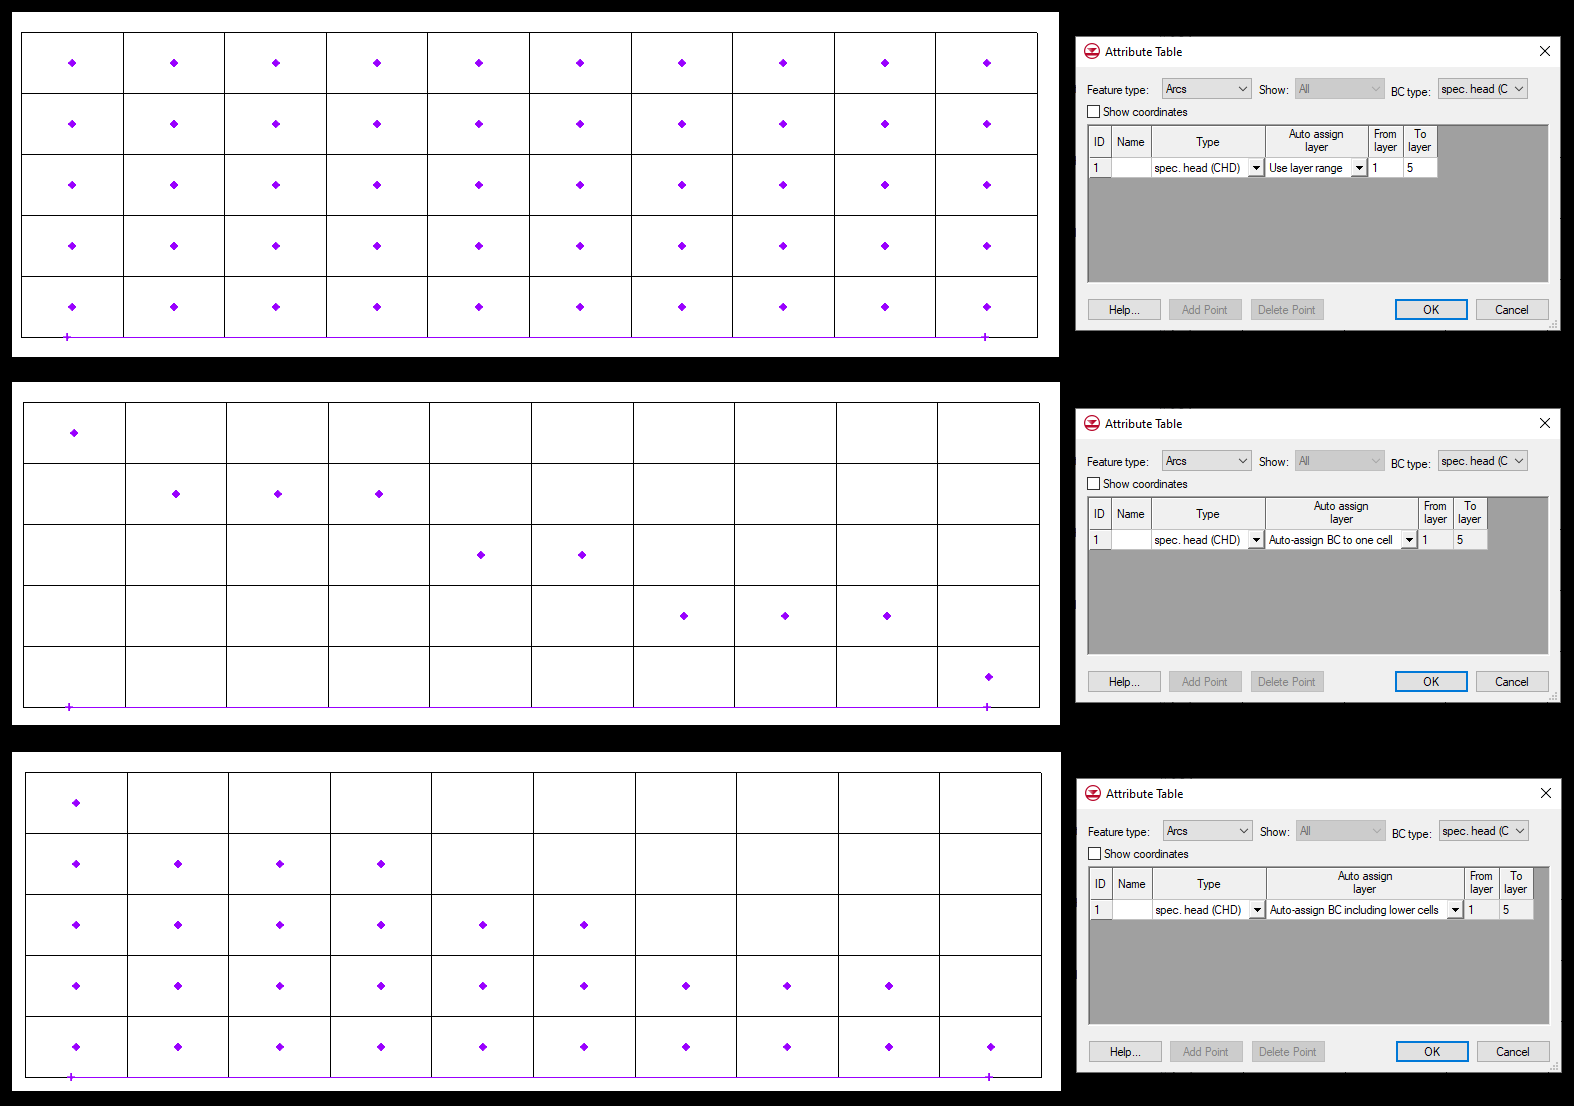
- Use Layer Range: This option applies your feature objects to a specific range of layers. That range is selected in the attribute table under "From Layer" and "To Layer". A feature point assigned a layer range of 2–6 will be applied to every cell in that vertical column from layer 2 to layer 6.
Similarly, a polygon or arc will apply its attributes to the whole assigned layer range for every vertical column that it intersects. - Auto-Assign BC to One Cell: Any time you want only one cell per column, you can choose "Auto-Assign BC to One Cell". This setting is especially useful when mapping an object type that can't or shouldn't be applied to more than one vertical cell at a time. Stream arcs are one example.
Auto-assigning to one cell will use the elevation inputs from your feature object to choose the most applicable cell in that vertical column to receive the assigned attributes. - Auto-Assign BC Including Lower Cells: This setting allows the coverage to automatically calculate which initial layer the object is applicable to, similar to the "One Cell" option. It then applies the object to that cell, and to everything below it within the range of the coverage.
Including the lower cells is very useful when you do want more than one vertical cell to be assigned, but need different layer ranges for different parts of the same feature object.
Once you have selected the Layer Range option that best suits your model, you can map the coverage to your simulation. The results can be viewed in the MODFLOW | Optional Packages dialogs, as well as the Sources/Sinks table in the right-click menu for the grid cells.
The Layer Range tool is a great way to get your model attributes as specific as you need them to be without any laborious manual editing. Try it out in your GMS model today.


