We use cookies to make your experience better. To comply with the new e-Privacy directive, we need to ask for your consent to set the cookies. Learn more.

How to Import and Use Real Precipitation Data in WMS
In hydrologic modeling, accurate precipitation input is critical to producing valuable results. The Watershed Modeling System (WMS) makes it easy to import and use real precipitation data from various sources, helping users build more accurate and dynamic simulations. This post walks you through the process of importing precipitation data into WMS and assigning it to your model.
Step 1: Locate Precipitation Data
First, acquire historical or real-time precipitation data in a compatible format. Common sources include:
-
NOAA’s National Centers for Environmental Information (NCEI) (https://www.ncei.noaa.gov) – Offers hourly or daily rainfall records.
-
PRISM Climate Group (https://prism.oregonstate.edu) – Provides gridded climate data.
-
USGS Water Data (https://waterdata.usgs.gov) – Includes precipitation data for specific gages.
Download the data as a text file (.txt or .csv) or as a gridded raster (.asc, .tif), depending on the type of model you are using.
Step 2: Format the Data for WMS
WMS supports various precipitation input formats, including:
-
Gage-based precipitation: Create a .gag file or import a .csv with gage ID, latitude/longitude, and time-series data.
-
Grid-based precipitation: Use ASCII raster files or netCDF datasets formatted with uniform spatial resolution.
If needed, preprocess the data in Excel or a GIS tool (like QGIS) to ensure it matches WMS input requirements. The Time Series Data Editor included with WMS can be used to format precipitation data.
Step 3: Import the Data into WMS
The specifics for importing precipitation data varies some depending on numeric model being used, however, the process is similar for models that allow importing precipitation. For example to import gage-based data:
-
Open your GSSHA project in WMS project.
-
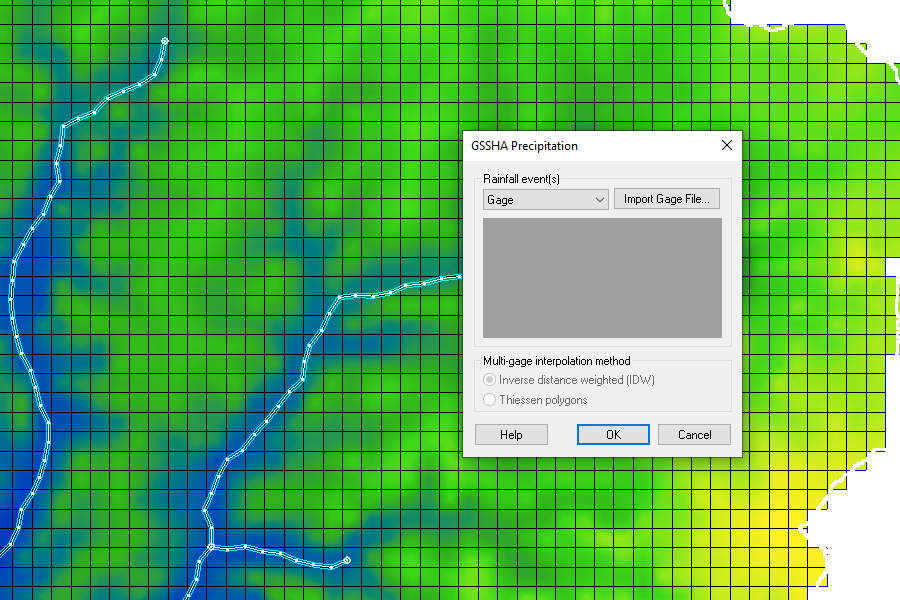
Go to the GSSHA menu and select Precipitation.
-
For the Rainfall event, select “Gage” then import your formatted data.
-
Assign gages to your sub-basins.
To import grid-based precipitation:
-
Use the GIS Data menu to import your raster or netCDF file.
-
Use the Interpolate to Model Grid tool if needed to map the data onto your model’s structure.
Step 4: Assign and Run
Once imported, assign precipitation data to each basin or time step in your model. Then run your simulation to see how the rainfall input affects runoff and hydrographs.
Final Thoughts
Using real precipitation data in WMS enhances model realism and reliability. It allows for scenario testing under actual weather conditions, improving decision-making for flood forecasting and watershed planning. Make use of precipitation data in your WMS projects today!
July 8, 2025
|
View: 4218
|
Categories: WMS
|
By: <a class="mp-info" href="https://aquaveo.com/blog/author/admin">Aquaveo Staff</a>
About the Author

Performing a Silent Install of XMS (Passwords & Hardware Locks)
October 10, 2018
Converting a NET File to an INP File
May 9, 2018
Computing Basin Curve Numbers in 9 Easy Steps
May 16, 2023
Performing a Silent Install for ALS
October 27, 2021
Tips for Finding Information on the XMS Wiki
September 25, 2019
Tips for Using Wells with MODFLOW 6
July 14, 2026
Enhanced Arc Geometry and Vertex Tools
July 7, 2026
SRH-2D Inflow & Outflow Best Practices
June 30, 2026
Troubleshooting Projection and Coordinate System Issues
June 23, 2026