We use cookies to make your experience better. To comply with the new e-Privacy directive, we need to ask for your consent to set the cookies. Learn more.
Fixing Negative Water Depth
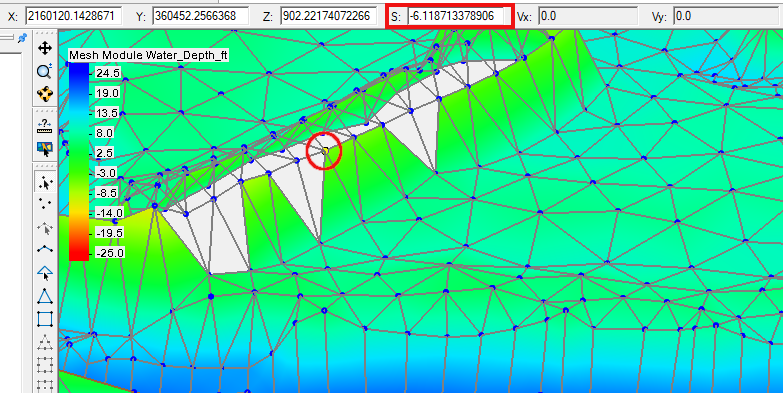
If you've worked with an SRH-2D model in the Surface-water Modeling System (SMS), you may have noticed that there will be times that some nodes appear to have a negative water depth. This can be problematic because it often doesn't reflect the true nature of the body of water. SRH-2D simulations default their calculations to be cell-centered, while meshes calculate data from the nodes. Inactive cells are set to have a null value of -999, but if you're working with meshes, the nodes that touch the inactive cells will interpolate with the value of -999, thus causing a negative water depth to generate on that node. If this is something you want to avoid, here are some ways to eliminate a negative water depth.

The first way to eliminate these negative water depth values from your SRH model when working with a mesh is to run your simulation as normal, and then use the Data Calculator in the Data Set Toolbox to truncate the data to a more desirable number, often this number will be zero. Follow these steps to truncate the data:
- Open the Data Set Toolbox under the Data menu.
- Under the Math section, select the Data Calculator.
- Find the dataset you are wanting to truncate, which will be labeled with "d#".
- Enter the following formula into the Calculator: "trunc(x,a,b)" where x is the dataset to be truncated, and where all the data will be greater than or equal to a, and less than or equal to b.
- Change the Output dataset name to one that suits your project.
- Click Compute, then close the Data Set Toolbox.
Make the new truncated dataset active in the Project Explorer, and note that the new minimum water depth is zero.

Another way to get rid of negative water depths is to use an unstructured grid (UGrid). Ugrids use the same cell centered calculations that SRH-2D does, so you won't run into the same issues with how the data is interpolated. If you have already created your simulation on a mesh, you can follow these steps to convert to a UGrid:
- In the Project Explorer, right-click the desired mesh and select Convert | Mesh → Ugrid.
- If desired, change the Output grid name to something that suits your project.
- Remove the mesh from the simulation by right-clicking on the mesh name under the SRH-2D Simulations folder and selecting Remove.
- Drag the newly converted UGrid under Sim in the SRH-2D Simulations folder.
- Run the simulation again.
SRH has now recalculated the data with the UGrid with only cell-centered interpolation, which should remove any unintended negative water depth calculations.
Go to SMS and try out these ways to eliminate negative water depth today!


