We use cookies to make your experience better. To comply with the new e-Privacy directive, we need to ask for your consent to set the cookies. Learn more.
4 Ways to Screen Capture in WMS
Are you needing to capture a screenshot of your WMS model? Fortunately, there are multiple ways to get a screenshot from WMS. This blog article will discuss four methods for using screen capture in WMS; two that use built-in Microsoft Windows capabilities and two that make use of the innate capacity of WMS.
Windows Methods
Microsoft Windows has a couple of innate methods for making a screen capture. One way is to use the Print Screen command found on the keyboard. This command will copy an image of the WMS screen into the computer's memory where the image can later be pasted into another program. Holding down the Alt key while using the Print Screen command method will limit the image to just the WMS interface if it is in the active window. This method, however, has one disadvantage considering that the captured image often needs editing.
Another method is to use the Snip tool. This tool initiates dragging a rectangle around the WMS interface. Like the Print Screen key, this saves the image in your computer’s memory which later needs to be pasted into a seperate program. This method has the advantage of allowing you to get a cropped version of the image.
Neither of the screen capture methods using the native Windows tools directly results in a usable image file.
WMS Methods
Using the WMS screen capture methods, a usable image file can be easily obtained. The Save As command and the Screen Capture command both create an image file that contains exactly what is displayed in the Graphics Window at the time the file is saved. This can help avoid having to copy and edit the image in a graphics software program.
To use the Save as command, go to File | Save As. In the Save As dialog, change the file type to be "JPEG Image File (*.jpg, *.jpeg)".
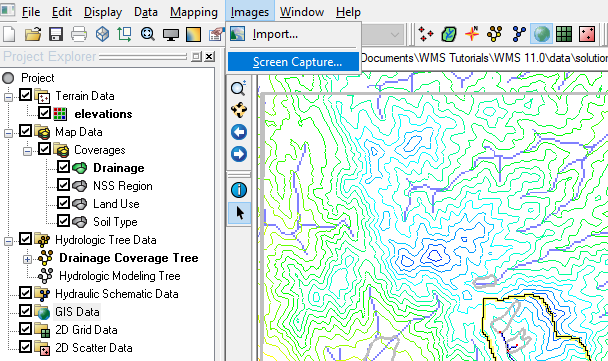
To use the Screen Capture command, make the GIS module active. Use the Image | Screen Capture command. In the save dialog that appears, save out the screen capture as a bitmap image.

Try out the screen capture capabilities of WMS today!


