We use cookies to make your experience better. To comply with the new e-Privacy directive, we need to ask for your consent to set the cookies. Learn more.

Compare Multiple Rainfall Scenarios in a Single WMS Project
Evaluating how a watershed responds to different rainfall events is a core task in hydrologic modeling. Engineers and hydrologists often need to compare design storms, historical rainfall events, and future what-if scenarios to support flood studies, infrastructure design, and watershed planning. The Watershed Modeling System (WMS) makes it efficient to manage and compare multiple rainfall scenarios within a single project.
Step 1: Set Up a Base Watershed Model
Begin by completing your watershed delineation and hydrologic setup:
-
Import terrain data and delineate basins and stream networks.
-
Assign basin parameters such as curve numbers, lag time, and routing methods.
-
Select your hydrologic model (e.g., GSSHA, HEC-HMS, HSPF, etc.).
Creating a solid base model ensures that only precipitation inputs vary between scenarios, making comparisons meaningful.
Step 2: Define Multiple Precipitation Events
WMS allows precipitation data and values to be entered in multiple locations. This depends on the model being used. There are three main areas to look at for defining precipitation events.
-
In the Map Module, a rain gage coverage can be defined to hold precipitation data. This will allow you to view some precipitation data.
-
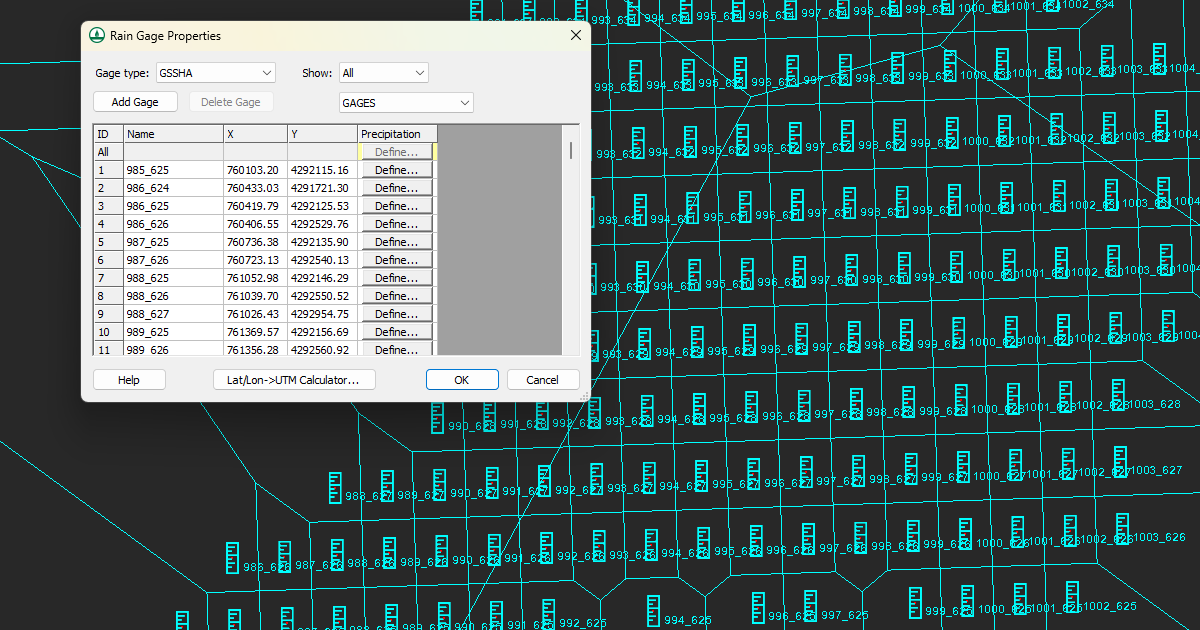
Many numeric models have a specific precipitation dialog that can be reached through the model menu when the model is active in the Hydrologic Modeling Module. For example, when the GSSHA model is being used, the Hydrologic Modeling Module will have a GSSHA menu where you can access the Precipitation command.
-
Numeric models can also have precipitation and rainfall event data in their Job Control dialogs. Even if you have defined precipitation somewhere else in WMS, it is important to check the Job Control for the numeric model to ensure that all parameters have been addressed for precipitation.
Rainfall and precipitation data can also be stored in WMS in scatter sets and other modules. When defining precipitation, you can create separate precipitation definitions for each scenario, such as:
-
A 10-year or 100-year design storm
-
A historical storm event
-
A hypothetical climate-adjusted rainfall scenario
Each precipitation dataset can use different durations, intensities, or temporal distributions (e.g., SCS Type II or user-defined hyetographs).
Step 3: Use Multiple Simulations in One Project
Rather than duplicating the entire project, WMS allows you to run multiple simulations efficiently:
-
Save each rainfall scenario as a unique simulation.
-
Keep basin geometry and parameters constant across simulations.
-
Run the model separately for each precipitation input.
This approach simplifies organization and reduces the risk of inconsistent parameter changes.
Step 4: Compare Results
After running the simulations:
-
Use WMS plotting tools to compare hydrographs, peak discharges, and runoff volumes at outlets.
-
Evaluate how changes in rainfall intensity or duration affect watershed response.
-
Export results for reporting or further analysis if needed.
Overlaying hydrographs is especially effective for visually comparing storm impacts.
Why This Matters
Comparing multiple rainfall scenarios within a single WMS project improves efficiency, consistency, and confidence in modeling results. It supports better decision-making for flood mitigation, infrastructure sizing, and risk assessment.
Download WMS today to take advantage of its many precipitation and rainfall tools.
January 20, 2026
|
View: 1761
|
Categories: WMS
|
By: <a class="mp-info" href="https://aquaveo.com/blog/author/admin">Aquaveo Staff</a>
About the Author

Performing a Silent Install of XMS (Passwords & Hardware Locks)
October 10, 2018
Converting a NET File to an INP File
May 9, 2018
Computing Basin Curve Numbers in 9 Easy Steps
May 16, 2023
Performing a Silent Install for ALS
October 27, 2021
Tips for Finding Information on the XMS Wiki
September 25, 2019
Tips for Using Wells with MODFLOW 6
July 14, 2026
Enhanced Arc Geometry and Vertex Tools
July 7, 2026
SRH-2D Inflow & Outflow Best Practices
June 30, 2026
Troubleshooting Projection and Coordinate System Issues
June 23, 2026