We use cookies to make your experience better. To comply with the new e-Privacy directive, we need to ask for your consent to set the cookies. Learn more.
Adding Notes in GMS
It happens from time to time—part of your groundwater model has something special that needs mentioning before handing it over to someone else. You may want to differentiate between two similar coverages without giving them long names, you may need to describe the real world source of a scatter set, or you need to explain how a quadtree was generated.
GMS provides an effective way to add notes to objects and datasets in order to aid in model development. There are two ways to add notes to objects in GMS.
The first is to add notes to object properties by doing the following:
- Right-click on an object in the Project Explorer and select the Properties command.
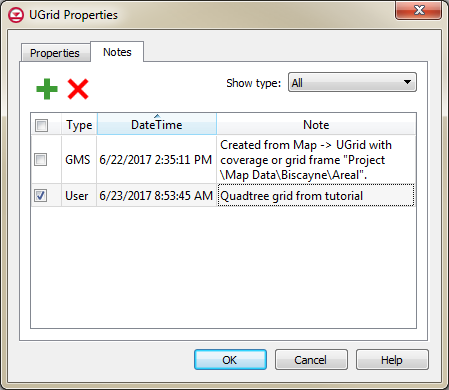
- In the Properties dialog, click on the Notes to tab to see all notes associated with the object.
- Click on the Add Row button to create a row where you can add your notes. The date and time you enter the note will automatically be added.

GMS can also automatically create notes when UGrids, datasets, and coverages are created. Using this feature requires that the Create GMS Notes Automatically option be turned on in the Preferences dialog.
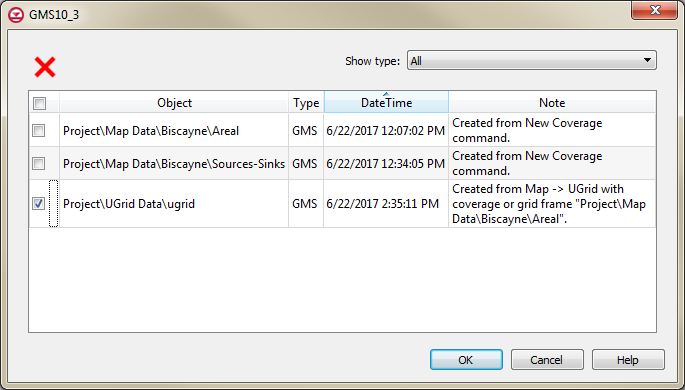
As your project grows, you may find some notes are no longer needed. You can delete notes by going into the Properties dialog and deleting notes individual. If you have several notes that need to be removed, deleting them individually could be a hassle. GMS makes it easier by placing all notes contained in a project into one location.
- Select the Notes command in the Edit menu to bring up a dialog with all notes made in the project.
- From this dialog, you can select and delete multiple unwanted notes.

Now that you’ve seen how to create notes, try adding notes to your projects in GMS 10.3.


